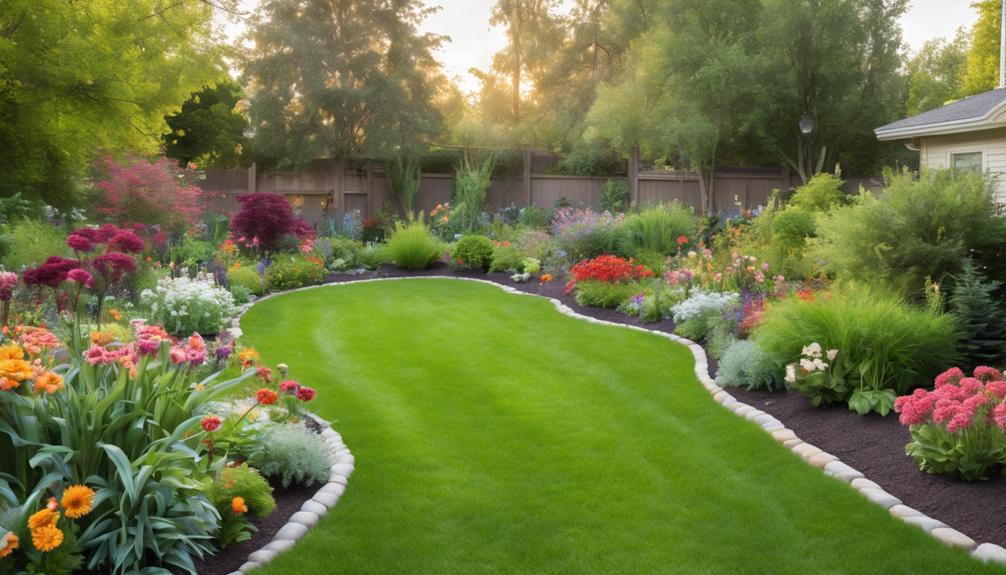
We'll start by evaluating our garden's water needs, taking into account climate, soil type, and plant spacing. Then, we'll select a drip irrigation kit tailored to our garden's specifics. After planning the layout, we'll mark paths for the drip tubes and attach them to distribution tubing using fittings. Next, we'll connect the system to a suitable water source, checking for leaks and damage. We'll add emitters and end caps, then test the system to confirm proper functioning. By following these steps, we'll create a simple yet effective drip irrigation system that conserves water and reduces waste. Now, let's get started and take the next step towards a more efficient garden.
Assessing Your Garden's Water Needs
Before we design our drip irrigation system, we need to ascertain how much water our garden actually requires. We can't just guess and risk overwatering or underwatering our plants. To get it just right, we'll need to calculate the total water requirements of our garden.
Let's start by identifying the types of plants we have and their specific water needs. Some plants, like tomatoes, require more water than others, like succulents. We can research the specific water requirements of each plant type to get an estimate of their daily water needs.
Next, we'll need to take into account the climate and soil type in our garden. If we live in a hot, dry climate, our plants will require more water than if we lived in a cool, humid climate. Similarly, if our soil is sandy and drains quickly, we'll need to water more frequently than if our soil is dense and retains moisture.
We can also ponder the size of our garden and the spacing of our plants. If our plants are densely spaced, they'll require more water than if they're spaced far apart. By factoring in these elements, we can get a more accurate estimate of our garden's total water requirements. Once we have this number, we can design a drip irrigation system that delivers the right amount of water to our plants, exactly when they need it.
Choosing the Right Drip Irrigation Kit
As we progress with our drip irrigation system installation, we need to select the appropriate kit for our garden's specific needs. We'll consider the different kit options available, taking into account our garden's size, soil type, and plant requirements. By doing so, we'll guarantee we get a kit that's tailored to our needs, with the right drip line configuration to efficiently water our plants.
Kit Options to Consider
We have numerous drip irrigation kit options to choose from, each taking into account specific gardening needs and budgets. As we explore the market, we'll find kits designed for small vegetable gardens, large landscapes, and everything in between. We'll also come across kits tailored to specific plants, like orchards or vineyards. Some kits are perfect for beginners, while others are geared towards experienced gardeners.
When selecting a kit, we need to take into account our garden's size, soil type, and climate. Do we have a small herb garden or a sprawling vegetable patch? Are we dealing with sandy soil or heavy clay? Answering these questions will help us narrow down our options. We should also think about the level of customization we need. Do we want a pre-assembled kit or a more flexible system that lets us design our layout? By reflecting on these factors, we can find a kit that meets our unique needs and helps our garden thrive.
Drip Line Configuration
With our garden's specific needs in mind, we now turn to the drip line configuration, a critical component of choosing the right drip irrigation kit for our unique setup. We're looking for a system that's tailored to our garden's layout, plant types, and soil conditions. Here, we'll focus on the type of drip line and its configuration to guarantee efficient water distribution.
We'll consider the spacing of our plants and the flow rate required to meet their needs. We might opt for a drip line with built-in emitters, which release water at a consistent rate, or a drip line with external emitters that allow for more flexibility. We'll also think about the length of our drip lines, ensuring they're long enough to reach all areas of our garden without kinking or tangling. By choosing the right drip line configuration, we'll create a system that's tailored to our garden's unique needs, guaranteeing our plants receive the right amount of water exactly where they need it.
Laying Out the Irrigation System
We'll begin by dividing our yard into separate irrigation zones, each containing plants with similar watering needs. This step is vital in ensuring our drip irrigation system is efficient and effective. By grouping plants with similar watering requirements, we can tailor the water delivery to meet their specific needs. For instance, if we have a section of flowers that require more frequent watering, we can create a separate zone for them.
As we map out our zones, we'll also consider the layout of our yard. We'll take note of any obstacles, such as trees, garden beds, or slopes, that might affect the installation process. We'll also identify the best routes for our drip irrigation tubes, taking care to avoid any areas where they might be damaged.
With our zones and layout planned, we can start marking out the paths for our drip irrigation tubes. We'll use stakes and string to create a visual guide, making sure to leave enough slack for any necessary adjustments. This step may require some patience and flexibility, but the end result will be a well-designed system that meets the unique needs of our garden. By taking the time to carefully plan our irrigation system, we'll be rewarded with healthy, thriving plants and a reduced water bill.
Connecting the Water Source
Now that we've laid out our irrigation system, we need to connect it to a water source. We'll start by locating a suitable water source, whether it's a hose bib, a well, or a municipal water connection. Next, we'll identify the correct hose fittings needed to make a secure connection and guarantee a reliable water supply.
Locating the Water Source
Since our drip irrigation system relies on a consistent water supply, we need to identify a reliable water source before moving forward with the installation. This is essential to guarantee our plants receive the right amount of water at the right time.
To locate a suitable water source, we'll consider the following options:
- Outdoor faucets: These are the most common water sources for drip irrigation systems. We'll choose a faucet that's closest to our garden to minimize hose lengths and reduce water pressure issues.
- Rain barrels or cisterns: If we have a rainwater harvesting system in place, we can use the collected water to feed our drip irrigation system. This is an eco-friendly option that reduces our water bill and dependence on municipal water supplies.
- Ponds or wells: If we have a pond or well on our property, we can use the water from these sources to irrigate our garden. However, we'll need to ensure the water is clean and free of contaminants that might harm our plants.
Identifying Hose Fittings Needed
With our water source selected, we're ready to connect it to the drip irrigation system, which requires identifying the right hose fittings to guarantee a secure and leak-free connection. We need to make sure that the fittings we choose are compatible with our water source and the drip irrigation system. To do this, we'll need to determine the type of hose we're using, as well as the size and thread pattern of the fittings.
For a standard garden hose, we'll likely need a 3/4' or 1' hose fitting. If we're using a soaker hose or a drip irrigation hose, the fittings may be slightly different. We'll also need to take into account the thread pattern of our fittings. The most common thread patterns are male and female National Hose (NH) threads, Garden Hose Threads (GHT), and British Standard Pipe (BSP) threads. By selecting the correct hose fittings, we can establish a secure connection that won't leak or come loose over time. With the right fittings in hand, we'll be ready to move on to the next step: connecting our drip irrigation system to the water supply.
Connecting to Water Supply
We connect our drip irrigation system to the water supply by attaching the hose fittings we've selected to the outdoor faucet or water source, establishing a secure and watertight connection. This is a critical step, as it's crucial to prevent leaks and guarantee our plants receive the right amount of water.
To make the connection, we'll need to:
- Attach the hose adapter to the outdoor faucet, making sure it's securely threaded
- Connect the drip irrigation tubing to the adapter, ensuring a snug fit
- Check the entire connection for any signs of leakage or weakness, tightening any loose fittings as needed
Installing Drip Tubing and Fittings
We'll start by attaching the drip tubing to the distribution tubing, making sure to secure it with fittings that match the tubing's diameter and material. This connection is important, as it will guarantee that water flows smoothly to our plants. We'll use fittings like barbed adapters, tees, and couplers to connect the tubing, taking care not to kink or twist the lines.
As we lay out the drip tubing, we'll want to carefully plan the route to avoid obstacles like trees, garden beds, and walkways. We'll use stakes or clips to secure the tubing to the ground, keeping it in place and preventing damage from weather or wildlife.
It's crucial to ensure the tubing is level and evenly spaced to maintain consistent water pressure throughout the system. We'll also need to take into account the flow rate and pressure of our water supply, adjusting the tubing's layout accordingly. By taking our time and paying attention to detail, we'll create a reliable and efficient drip irrigation system that will benefit our garden for seasons to come.
With our drip tubing and fittings in place, we'll be one step closer to enjoying a thriving, water-efficient garden that's the envy of the neighborhood. By working together, we can create a beautiful outdoor space that nourishes both our plants and our sense of community.
Adding Emitters and End Caps
Now that our drip tubing is securely in place, it's time to add emitters that will release water directly to the roots of our plants. This is where the magic happens, and our plants will start to thrive. We'll be using inline emitters, which are spaced at regular intervals along the tubing. These emitters have a small hole that allows water to flow out at a controlled rate, guaranteeing our plants receive the right amount of moisture.
To add the emitters, we'll simply punch a hole in the tubing using a specialized tool, and then insert the emitter. It's essential to space them correctly, so our plants receive consistent watering. Here are some tips to keep in mind:
- Space emitters 6-12 inches apart, depending on the type of plant and its water requirements.
- Place emitters near the base of the plant, where the roots are most active.
- Use a consistent spacing pattern to make sure even watering throughout the garden bed.
Once we've added the emitters, we'll need to cap the ends of the tubing to prevent water from flowing out. This is where the end caps come in. We'll simply attach them to the ends of the tubing, making sure they're securely locked in place. With our emitters and end caps in place, we're one step closer to a fully functional drip irrigation system.
Testing the Irrigation System
After completing the installation of emitters and end caps, it's important to test the irrigation system to verify that it's functioning as intended. We want to make sure that water is flowing correctly through the tubes and that our plants will receive the right amount of moisture. To do this, we'll need to turn on the water supply and inspect the system from start to finish.
Here's a simple checklist to follow during the testing process:
| Component | What to Check |
|---|---|
| Tubes and fittings | Look for leaks or signs of damage |
| Emitters | Check that water is flowing from each one |
| End caps | Verify that they're securely attached |
As we test the system, we'll also want to check for any blockages or kinks in the tubes that could restrict water flow. If we find any issues, now's the time to address them before our plants suffer. By taking the time to thoroughly test our irrigation system, we can be confident that our garden will receive the water it needs to thrive.
Scheduling Watering Sessions
With our drip irrigation system up and running, it's crucial that we establish a watering schedule that caters to our plants' unique needs, guaranteeing they receive the right amount of moisture at the right time. This schedule will not only prevent overwatering but also secure our plants receive the right amount of water to thrive.
To create an effective watering schedule, we need to take into account a few factors. Here are some key considerations:
- Soil type: Different soils have varying water-holding capacities. We need to adjust our watering schedule based on our soil type to avoid waterlogging or drying out.
- Climate and weather: We should adjust our watering schedule according to the weather. In hot and dry weather, our plants may need more frequent watering, while in cool and rainy weather, they may need less.
- Plant type and growth stage: Different plants have varying water requirements. We should adjust our watering schedule based on the type of plants we have and their growth stage.
Maintaining the System
We've worked hard to set up our drip irrigation system and establish a watering schedule, and now it's our responsibility to guarantee it continues to function efficiently, which demands regular maintenance checks. This secures our plants receive the right amount of water, and we avoid wasting this precious resource.
Regular maintenance also helps prevent clogs, which can be a real headache. We don't want to deal with a broken system when our plants need water the most. By staying on top of maintenance, we can enjoy a lush, thriving garden all season long.
Here's a quick rundown of our maintenance schedule:
| Task | Frequency |
|---|---|
| Check for clogs and kinks | Weekly |
| Inspect emitters and replace if necessary | Monthly |
| Flush the system to remove sediment | Quarterly |
| Inspect the entire system for damage | Seasonally |
Frequently Asked Questions
Can I Use a Drip Irrigation System With Well Water or Rainwater?
We can make sure that we can definitely use a drip irrigation system with well water or rainwater! In fact, these alternatives to municipal water can be super beneficial for our gardens. Since well water and rainwater are often free from chemicals and additives, they can be gentler on our plants and soil. We just need to guarantee our system is properly filtered to prevent clogs and debris buildup.
How Often Should I Clean or Replace the Irrigation System's Filters?
'As we tend to our gardens, we're reminded that a drip irrigation system is only as good as its filters. We've learned that regular cleaning and replacement are vital to prevent clogs and guarantee our plants receive the nourishment they need. We recommend checking filters every 1-2 months, depending on water quality, and replacing them every 3-6 months or as needed. By doing so, we're ensuring our gardens thrive, and our hard work doesn't go to waste.'
Will a Drip Irrigation System Work With Raised Garden Beds?
We're thrilled to explore this question! Yes, a drip irrigation system can absolutely work with raised garden beds. In fact, it's a fantastic combo! Since raised beds typically have better drainage, the drip system can focus on delivering water directly to the roots, reducing evaporation and runoff. We've seen amazing results with this setup, and we're confident you will too!
Can I Integrate a Drip Irrigation System With a Smart Watering Controller?
Did you know that smart irrigation controllers can save up to 20% of water usage? We're excited to integrate our drip irrigation system with a smart watering controller! Fortunately, it's totally doable. We can connect our drip system to the controller, which will automatically water our plants based on real-time weather data, soil moisture levels, and other factors. This means we'll have more free time and a lush, thriving garden – it's a win-win!
Are Drip Irrigation Systems Suitable for Container Gardens?
We've got a great question on our hands – are drip irrigation systems suitable for container gardens? Absolutely! We've found that drip irrigation is a fantastic way to deliver water directly to the roots of plants in containers, reducing evaporation and runoff. It's especially useful for containers with limited soil volume. We've seen great results in our own container gardens, and we're confident you will too!